Soemtron Calculators Gallery
Skip to navigationThe Soemtron 220
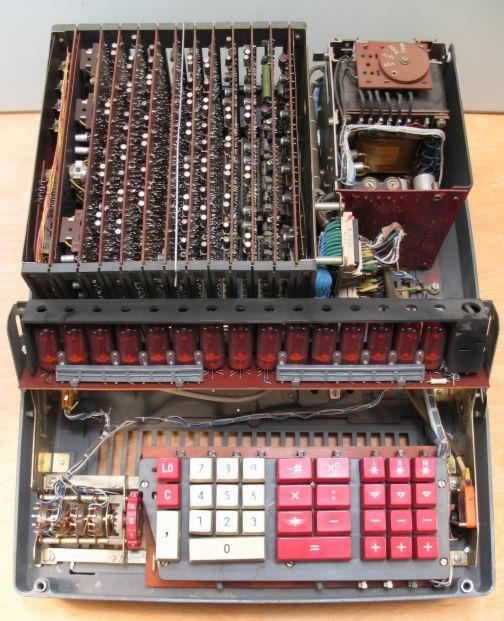
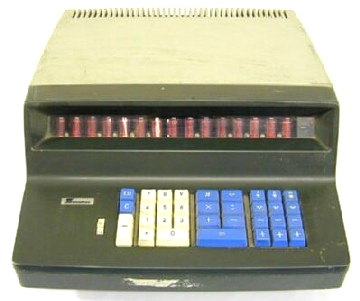
Many thousands of Soemtron ETR220's were made during their production run and by modern standards they are large and cumbersome, but very typical of their age - the 1960s. This section shows a few views of a typical Soemtron ETR220 in good condition owned by calculator collector Serge Devidts. Manufactured from 1966 to 1977 by V.E.B. Büromaschinenwerk Sömmerda, 155,142[1] Soemtron ETR220 desktop calculators were built during the eleven year production run.
 |
 |
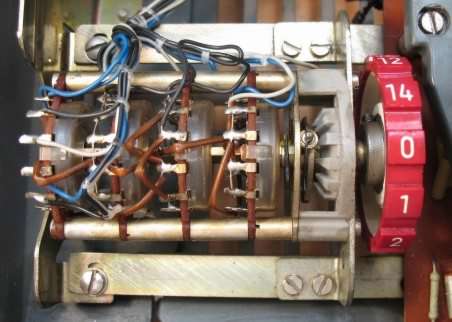 Decimal point |
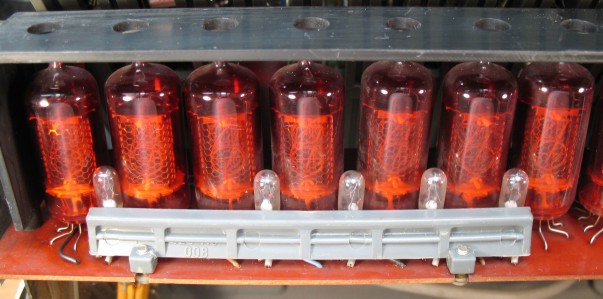 Nixie tubes |
| Photos ©2007 Serge Devidts, used with permission Click any image for a larger version | |||
The Soemtron 221
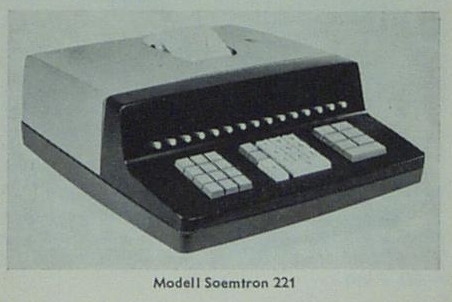
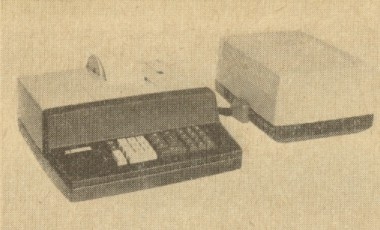
Following a chance comment by Bernard Green, about the existence of a possible ETR221 unit, an email from Serge Devidts has confirmed that there was at some time a two part ETR221. Bernard had suggested the existence of just such a machine, having said that he recollected seeing a two part unit shipped into the UK whilst he was working at Office and Electronic Machines Ltd. (OEM Ltd.)[2] in London. The 221 is a printing version of the ETR220, but split into two parts: a desktop unit with keyboard and printer mechanism, and an ancillary unit (floor or desktop?) with the main electronics (and power supply?). So far only one of these units is known to have existed, that unit shipped to the British importer of Soemtron calculators - Office and Electronic Machines Ltd. (OEM Ltd.) - in London.
 ETR221 |
 Publicity |
Picture ©2009 Serge Devidts, used with permission Click any image for a larger version |
The Soemtron 222
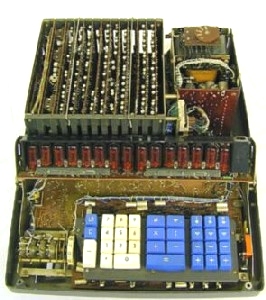
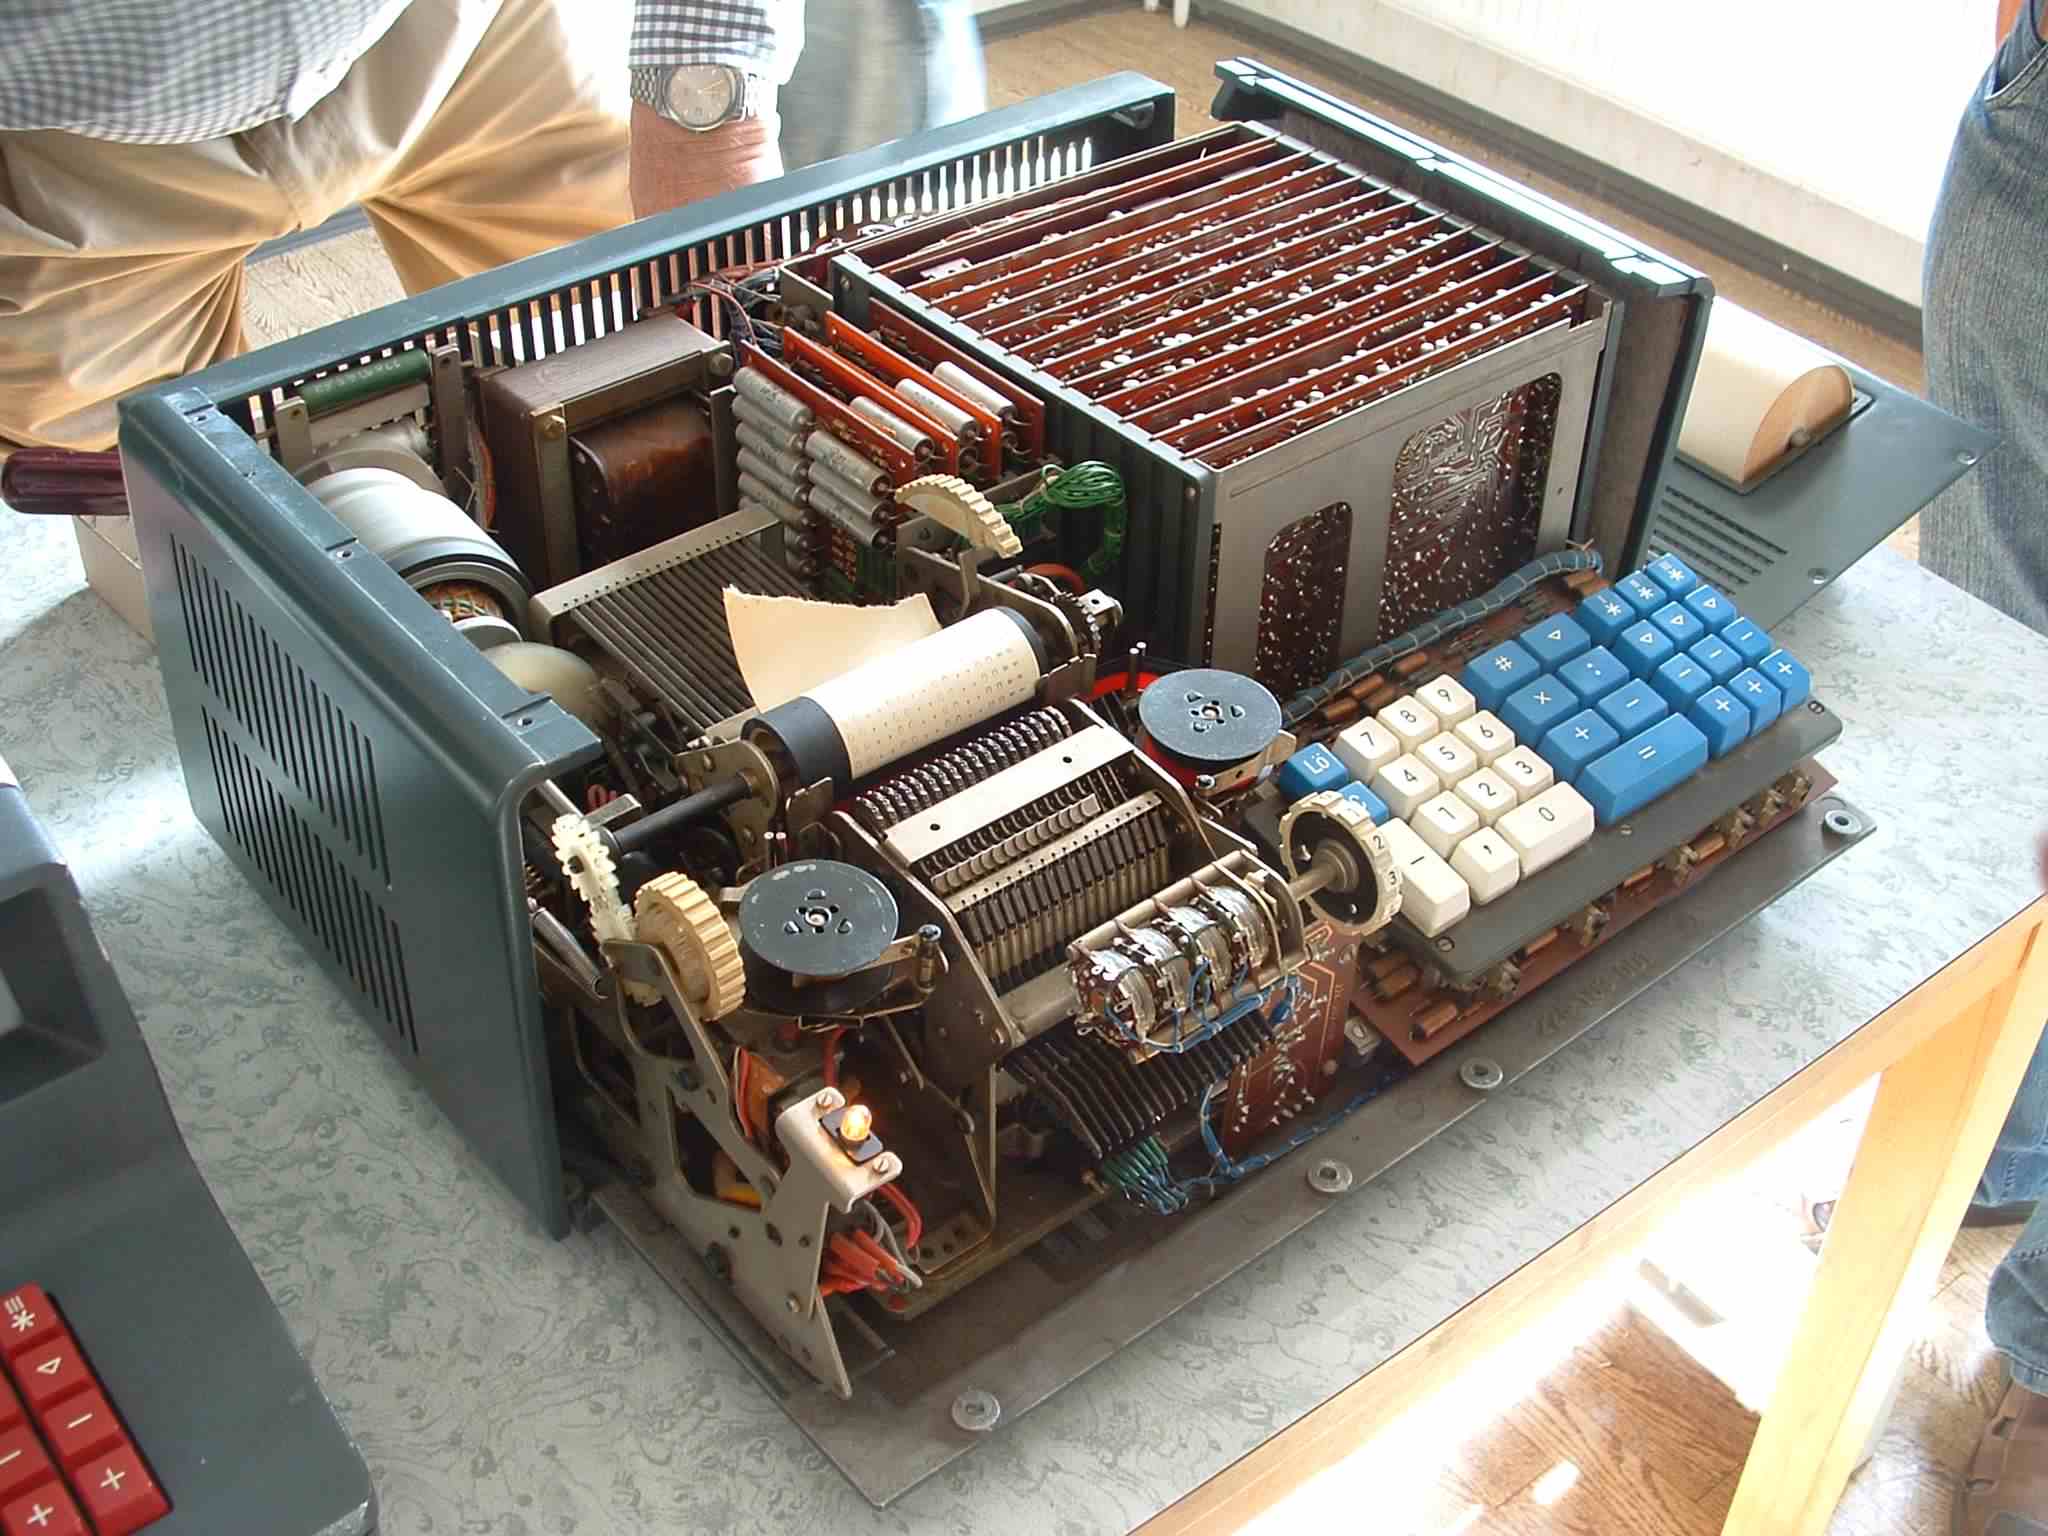
Manufactured from 1970 to 1972 by V.E.B. Büromaschinenwerk Sömmerda, 3,203[3] Soemtron ETR222's were built during the two year production run. The processing logic of the Soemtron ETR222 calculator, derived from the ETR224, is all transistorised.
 |
 |
Photos ©2007 Rüdiger Kurth Used with permission. Click any image for a larger version |
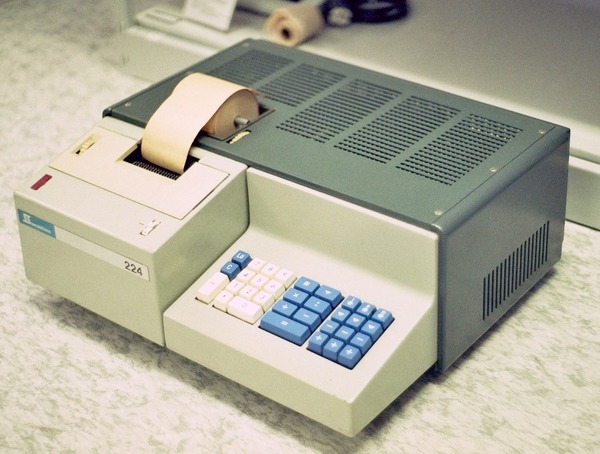
The Soemtron 224
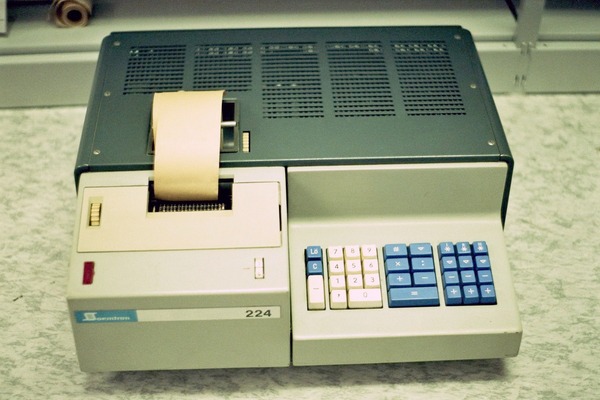
With only 526[4] machines built in a six year period, again by V.E.B. Büromaschinenwerk Sömmerda, the ETR224 is now a very, very rare machine. Currently only four Soemtron ETR224s are known to remain in existence, one in the museum in Sömmerda, one in a private collection also in Sömmerda, one in our collection and one in a museum in Naunhof.
 |
 |
 |
Photos ©2009 Rüdiger Kurth and www.soemtron.org Click any image for a larger version |
Soemtron factory EFA381 prüfgeräte (test equipment)
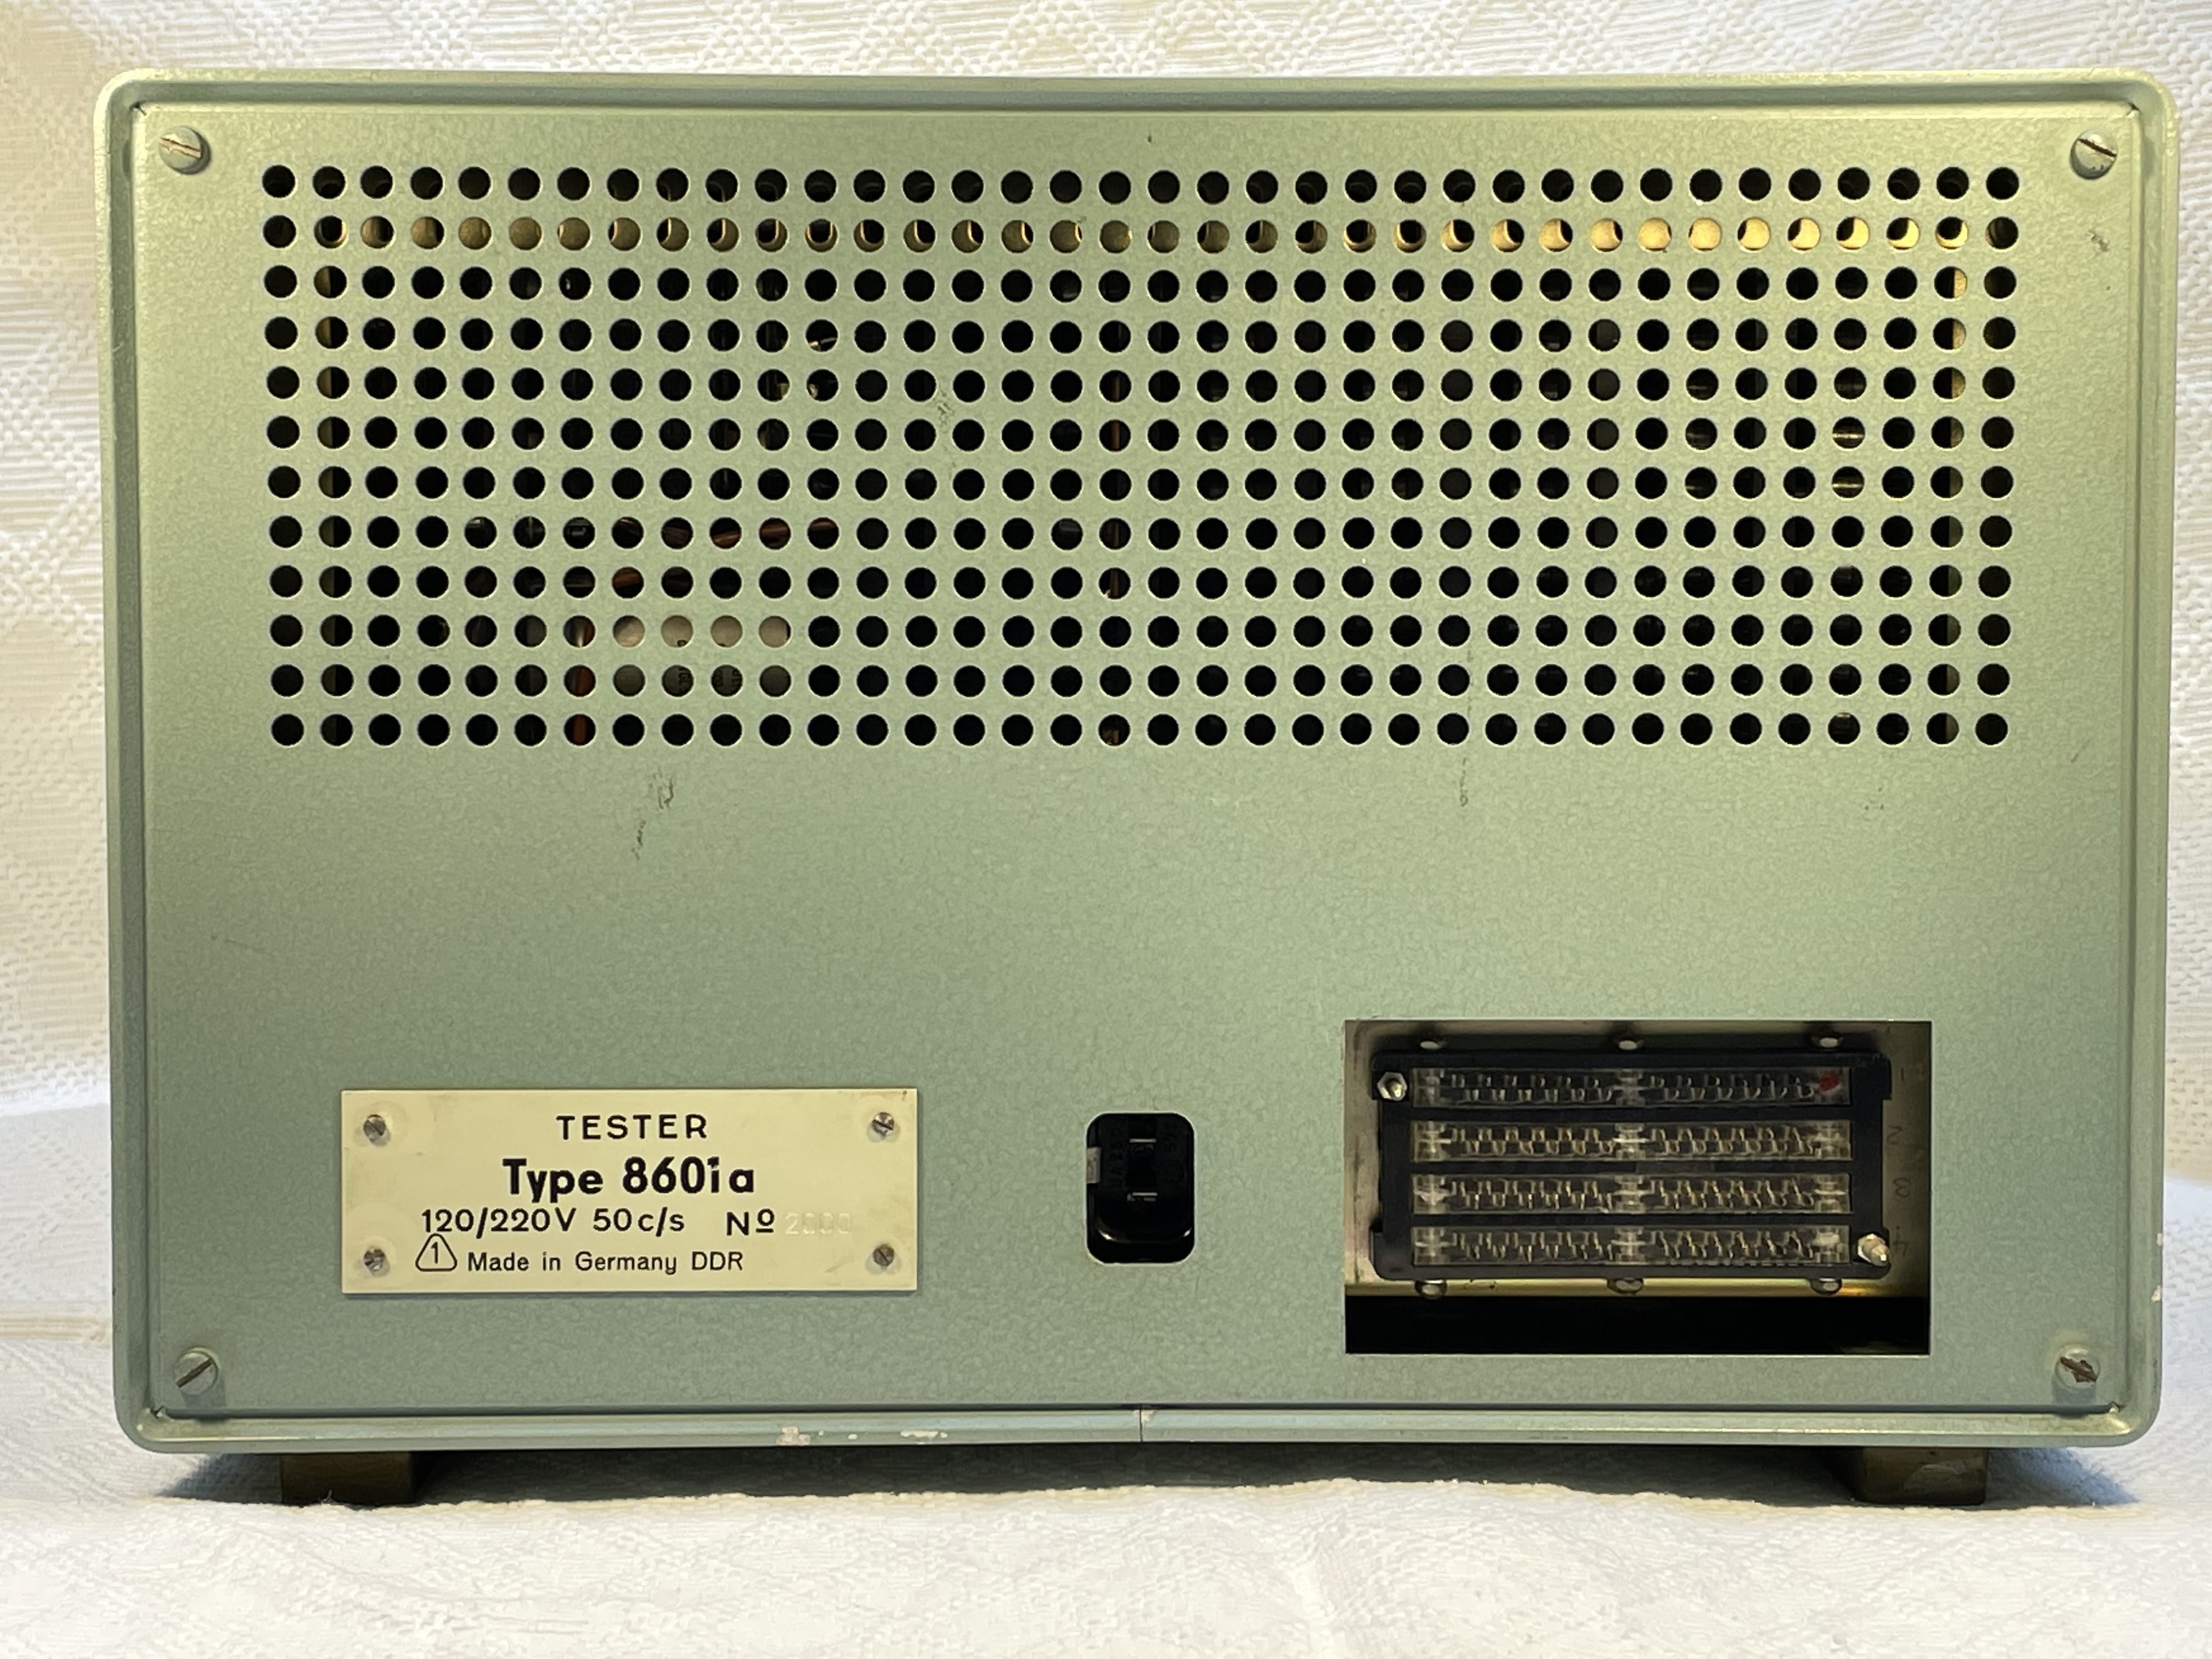
Test equipment for the Soemtron machines was thought very unlikely to ever be found, indeed in discussions with engineers from the old Soemtron factory during a trip to Sömmerda it transpires that the factory and all of its contents are long gone. However we were recently contacted by Frank Z. in Germany who had listed an EFA381 (8601a) tester on Ebay from an estate sale of a collection of old radios, tape recorders, vinyl players and other sundry equipment.
This particular unit is a field service variant as it comes with it's own leather carry case, cables, and panels for the EFA range of invoicing macines, it is however the same as the units used on the main ETR production lines, a very rare piece of equipment. Our thanks go to Frank for donating it to the Soemtron collection.
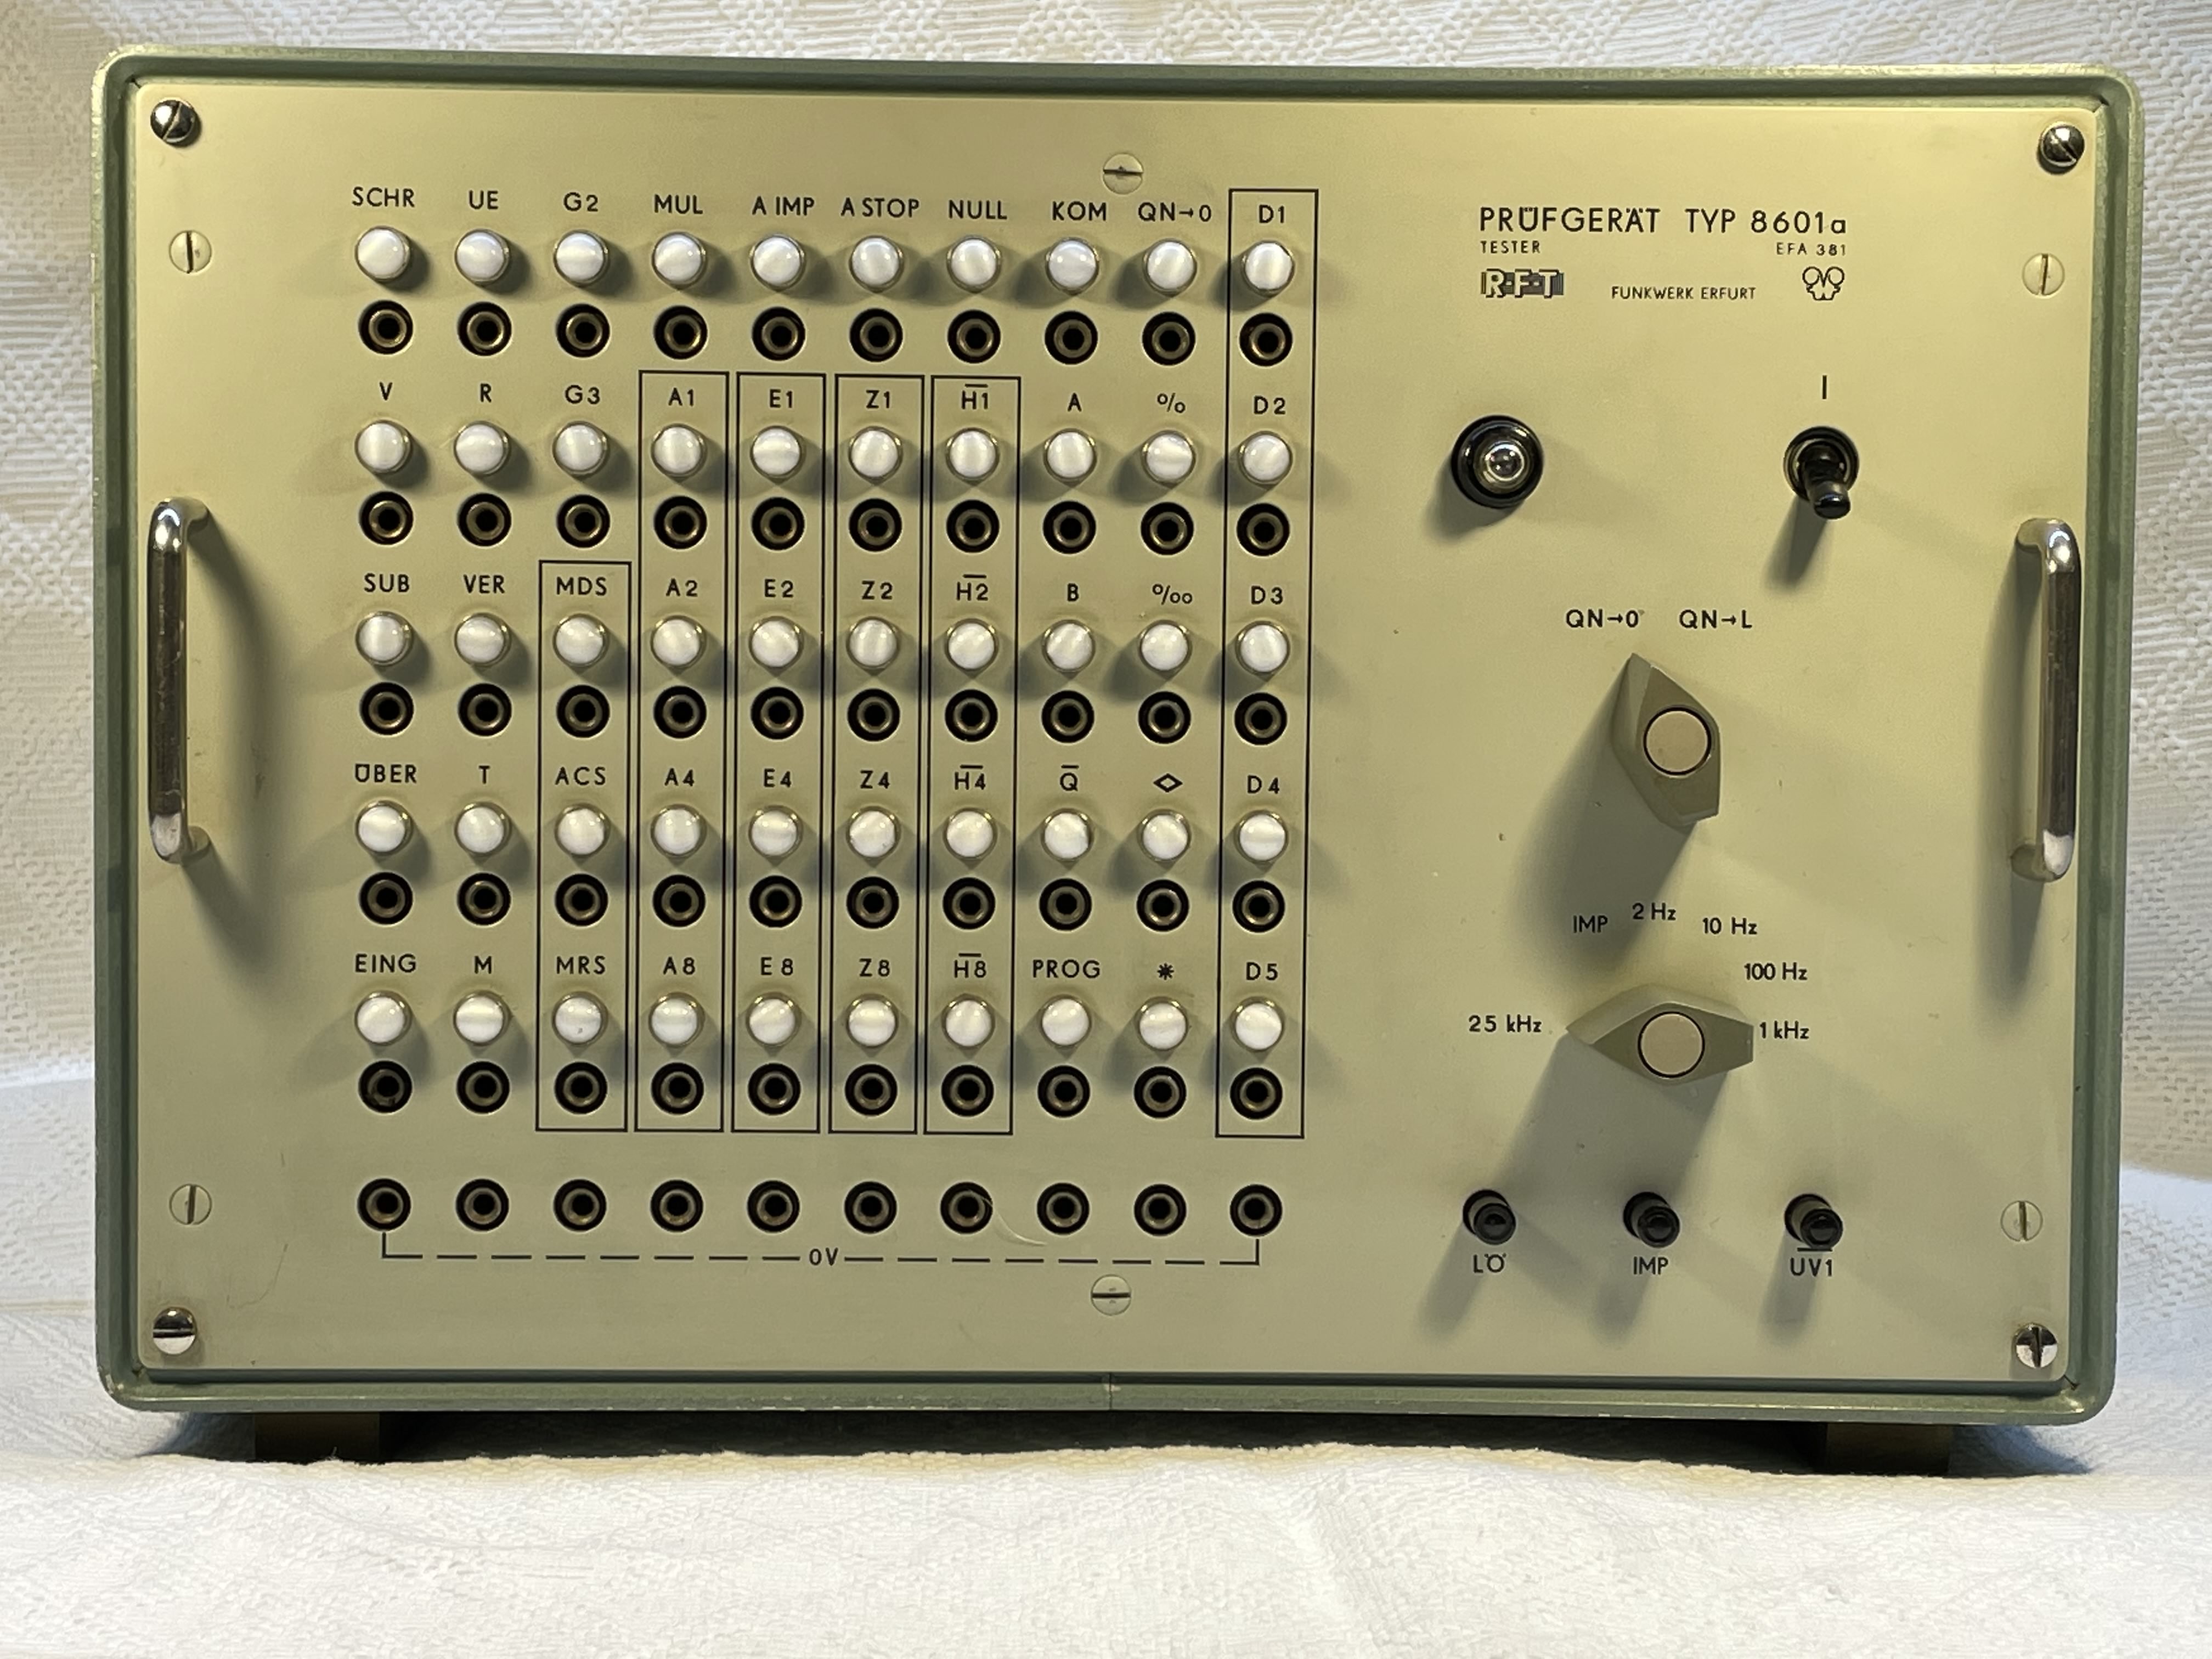 Prüfgerät 8601a front |
 Prüfgerät 8601a rear |
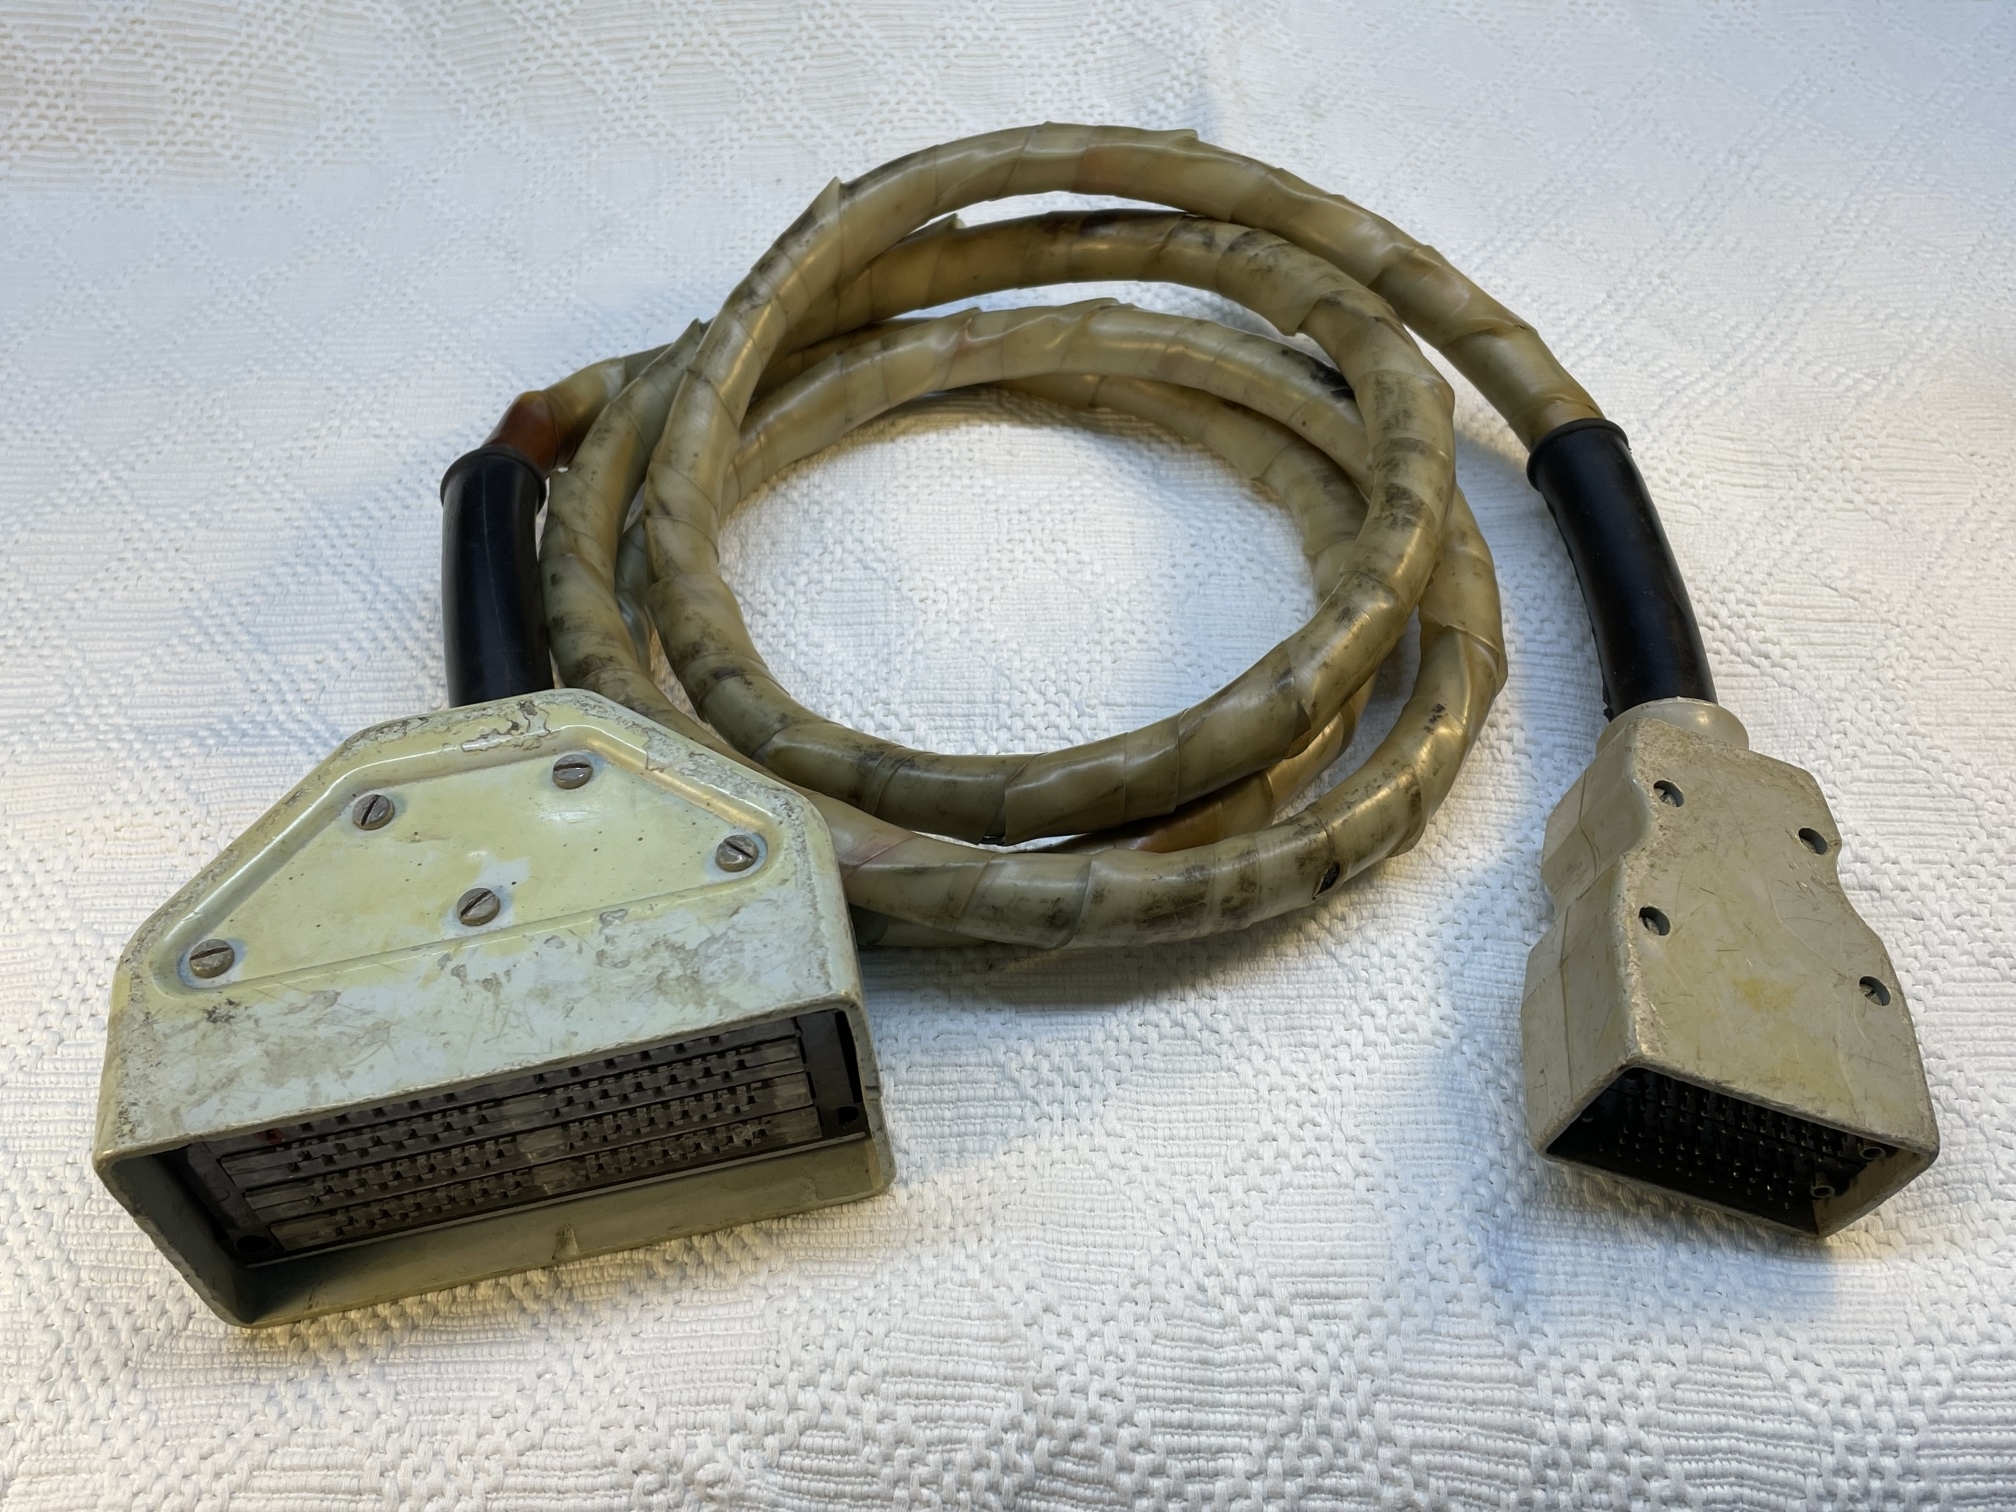 Prüfgerät 8601a test cable |
Our own prüfgeräte (test equipment)
To help in our efforts to decode the Soemtron machines we have designed our own test equipment, and one of the first and most useful bits we built was an extender board. 31 pin DIN style connectors for the Soemtron boards are no longer available and attempts to remove them from scrap boards have proved to be almost impossible. We have designed and built our own connectors utilising a custom PCB to provide the correct pin spacing for both the plug and the socket, an aluminium panel and interconnecting wiring completed the unit. The extender is also capable of holding an 8 way display board with flying lead test clips so that up to eight signals on an extended board an be monitored. Pins for the connectors were sourced from Harwin (P#H2170-01 pins, and H3194-05 sockets) and our grateful thanks go to Harwin for their help with this project. its not the prettiest bit of kit by any means but it works and has proved invaluable in decoding the inner workings of the Soemtron ETR calculators.
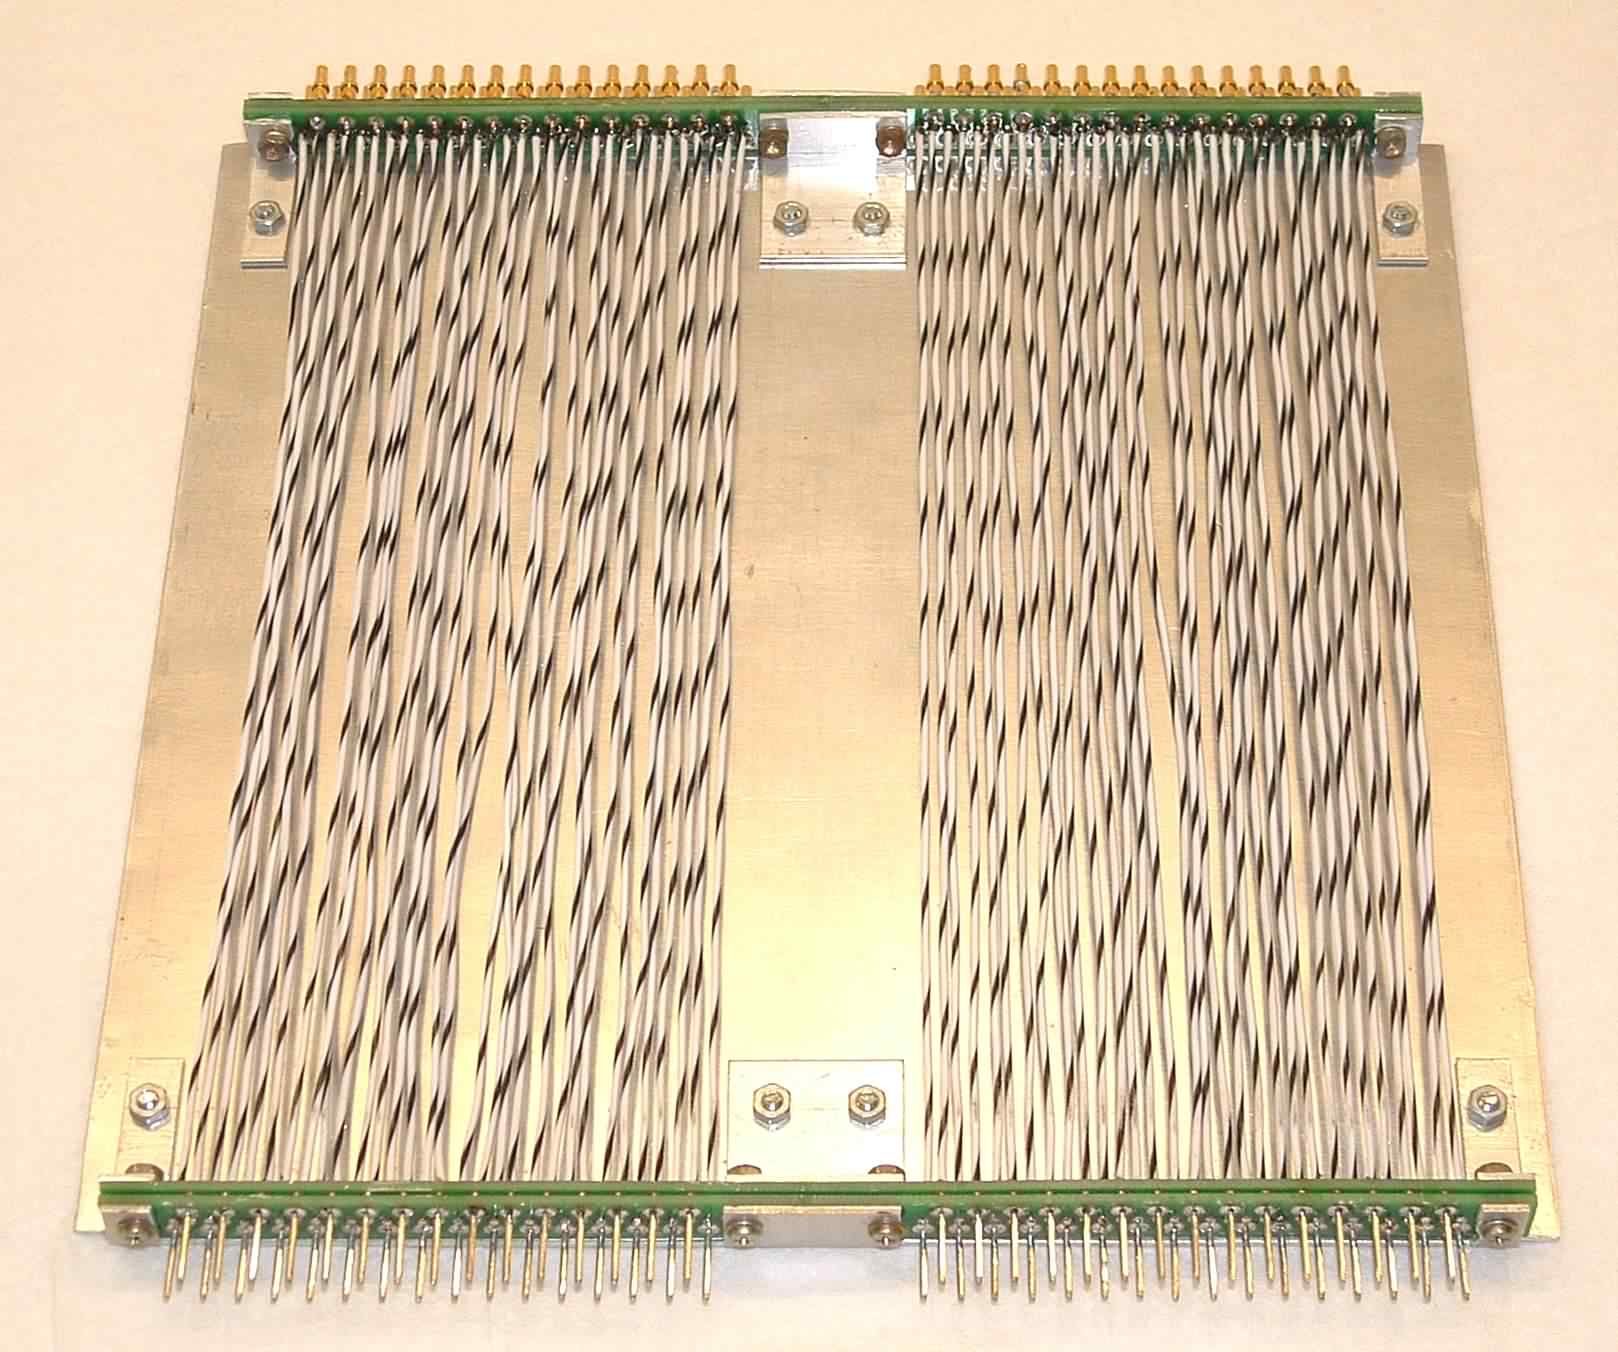 |
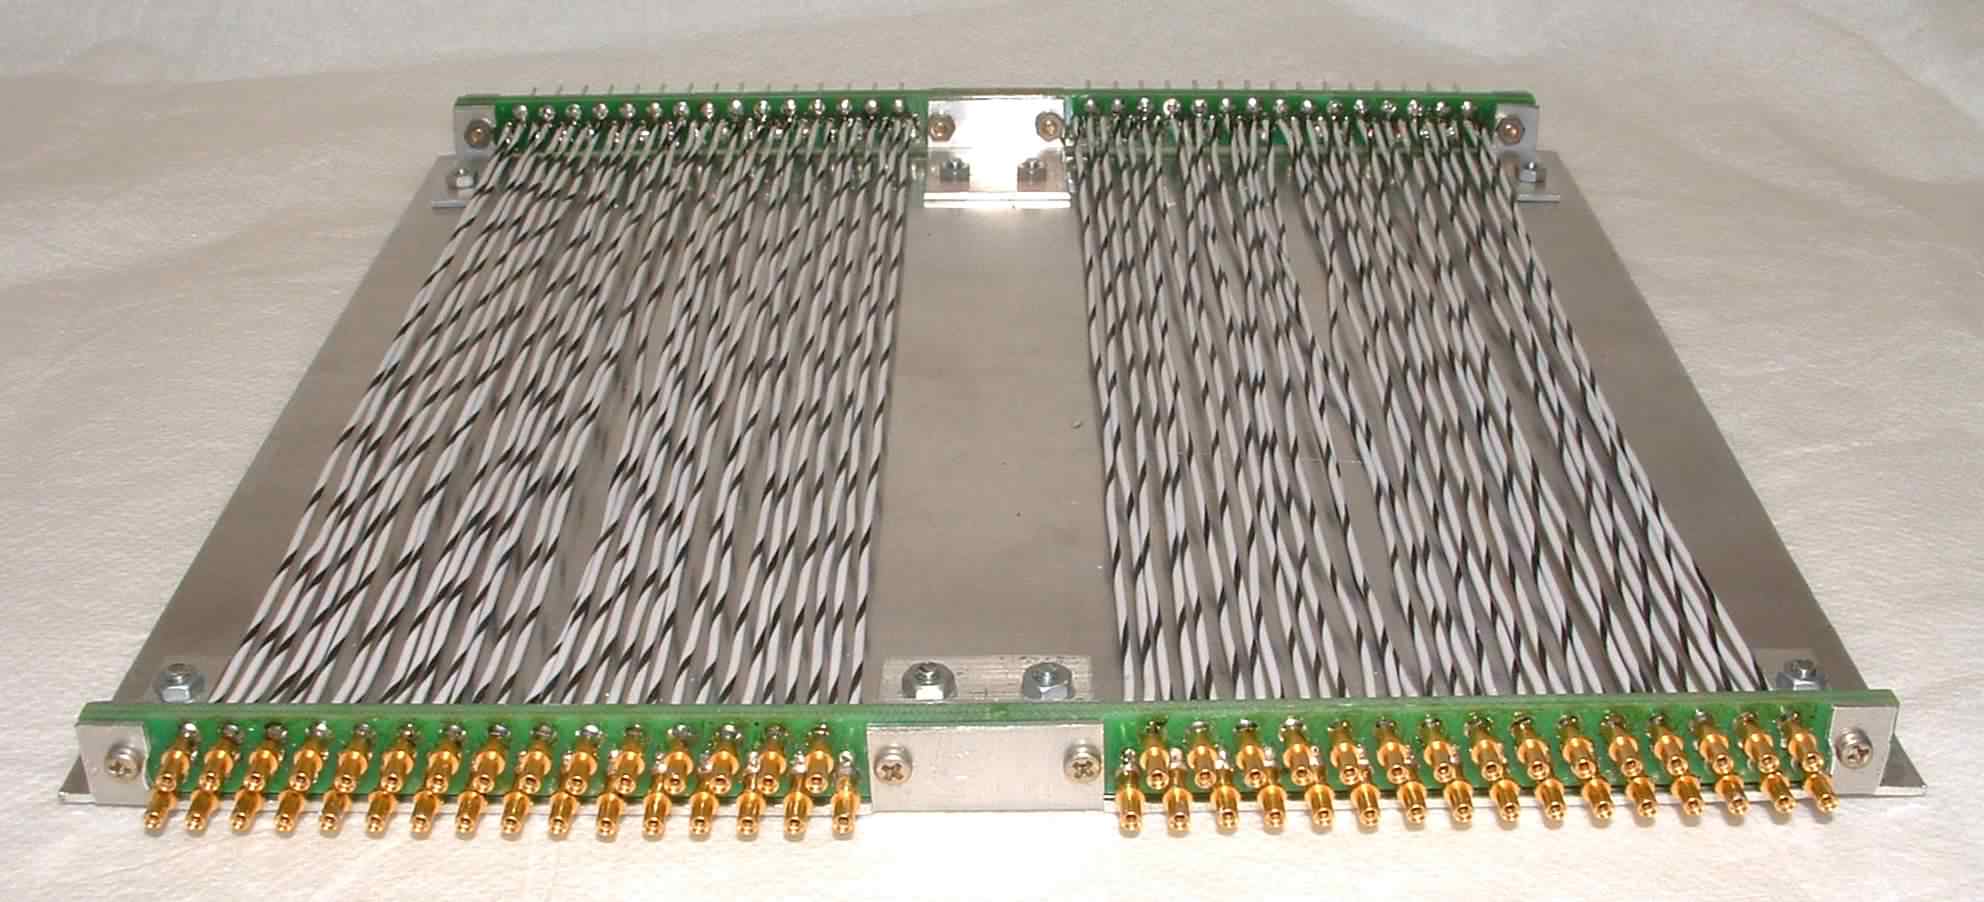 Socket |
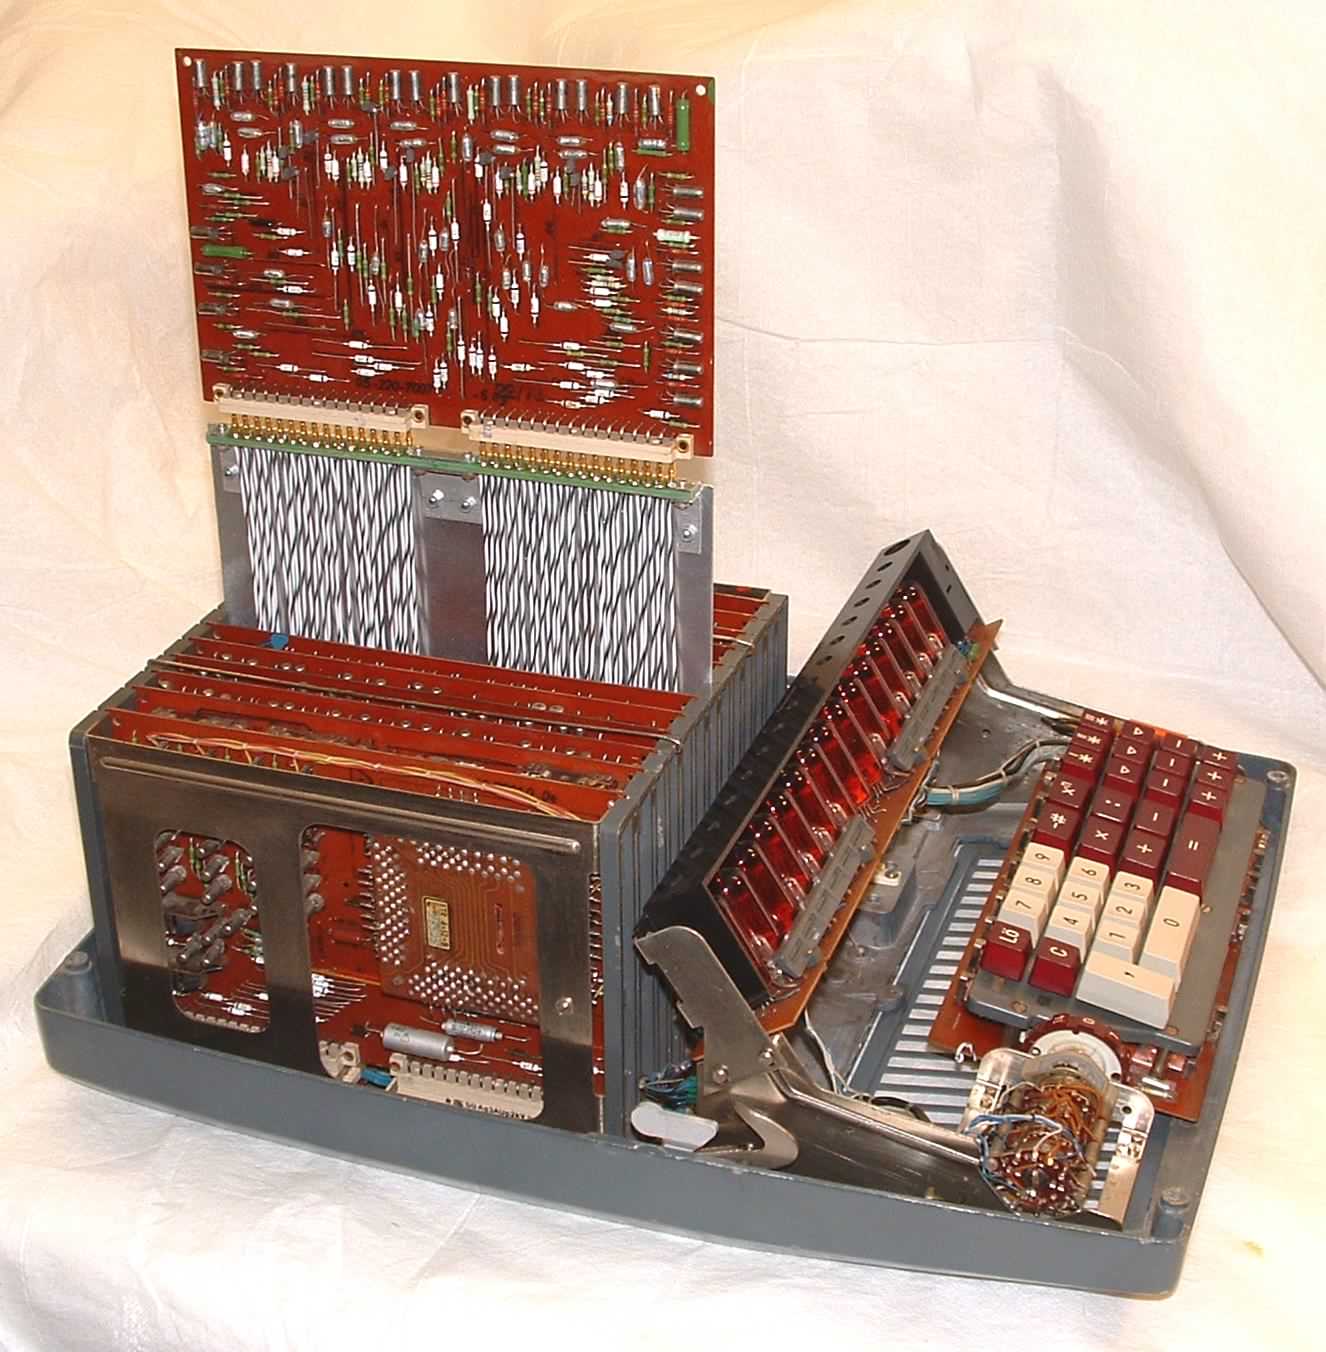 Usage |
 Usage |
| Click any image for a larger version | |||
Soemtron ETR220 production
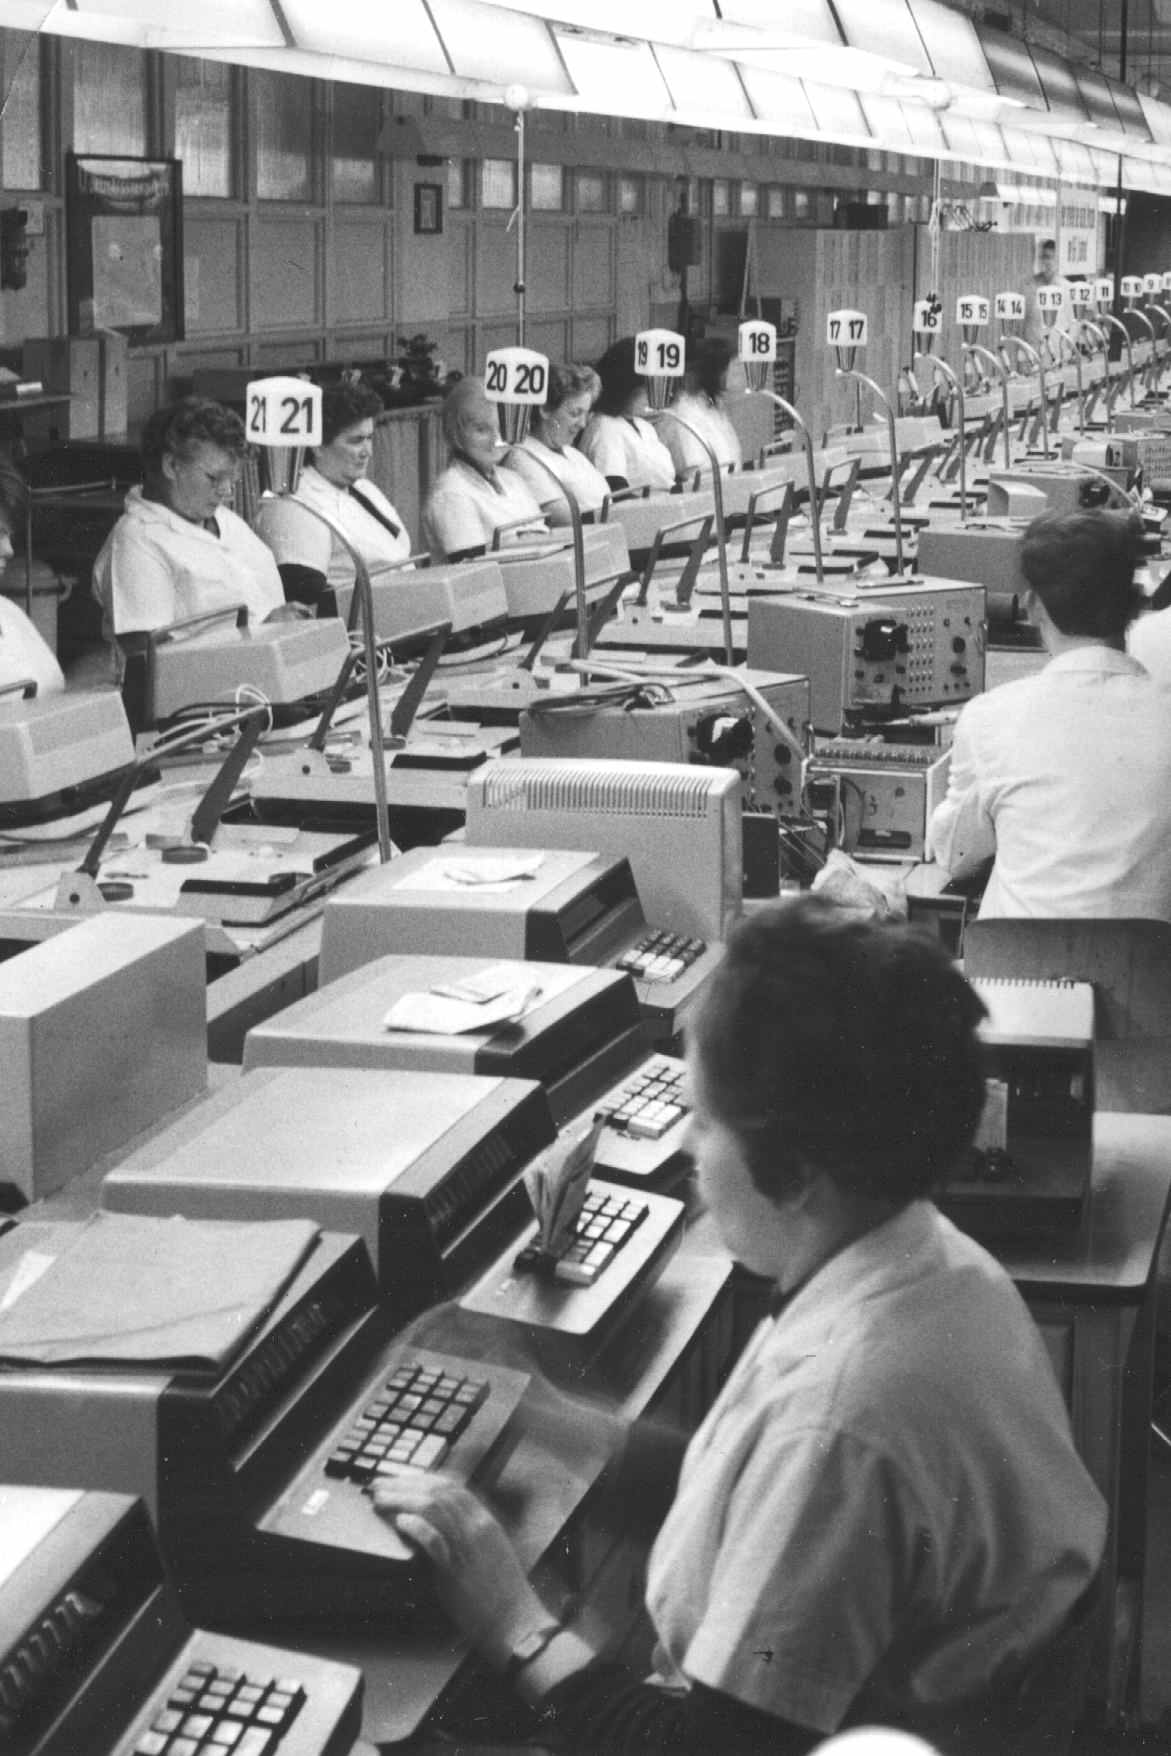
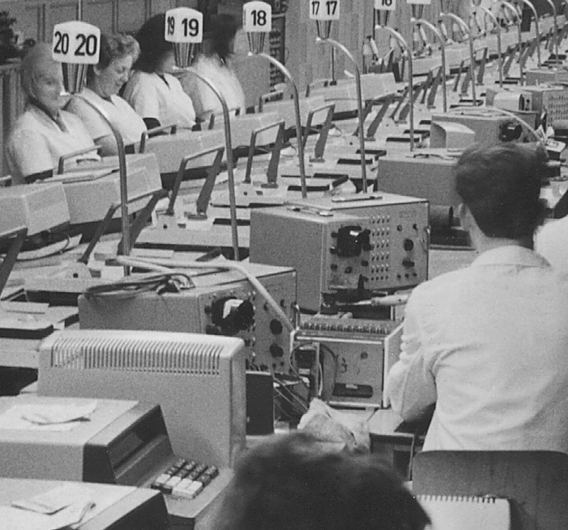
Two photos here show a Soemtron ETR220 production line from the book "BWS Sömmerda", by Annegret Schüle, (ISBN 39–8039–311–9, or ISBN 978–39–8039–311–9) published by Desotron Erfurt in 1995. Dr. Günter Hartmann of DESOTRON has kindly given us permission to use these images from the book.
The two photos (below left) show the ETR220 production line, with the left side of the production line appearing to be operators assembling or checking each machine, whilst the right side appears to be a row of technical checkout or diagnostic stations. Each station has an oscilloscope and a "Prüfgerät" or test box beside it to aid in de–bugging. Listed in the Russian technical manual as a "display panel of an electronic invoice machine « Soemtron–381 » of type 8601", the Soemtron Prüfgerät was a custom designed piece of test equipment that plugs into a pair of diagnostic connectors inside the machine. All three models of the ETR range have these test connectors, and we suspect that there were separate panel overlays for the test box to show the differing flip–flop arrangements between the models - especially as the manual instructs "4) Fit the display legend to the indicator panel (Fig. 32)). (Service connector differences table). An ETR220 panel layout can be seen on page 185 in the Russian Technical Manual on the "Downloads" page. Interestingly each ETR undergoing test appears to be in a master carrier frame, its not known at this time if this was just to assist in moving the units around or if they were actually used for electrical connections in the test process.
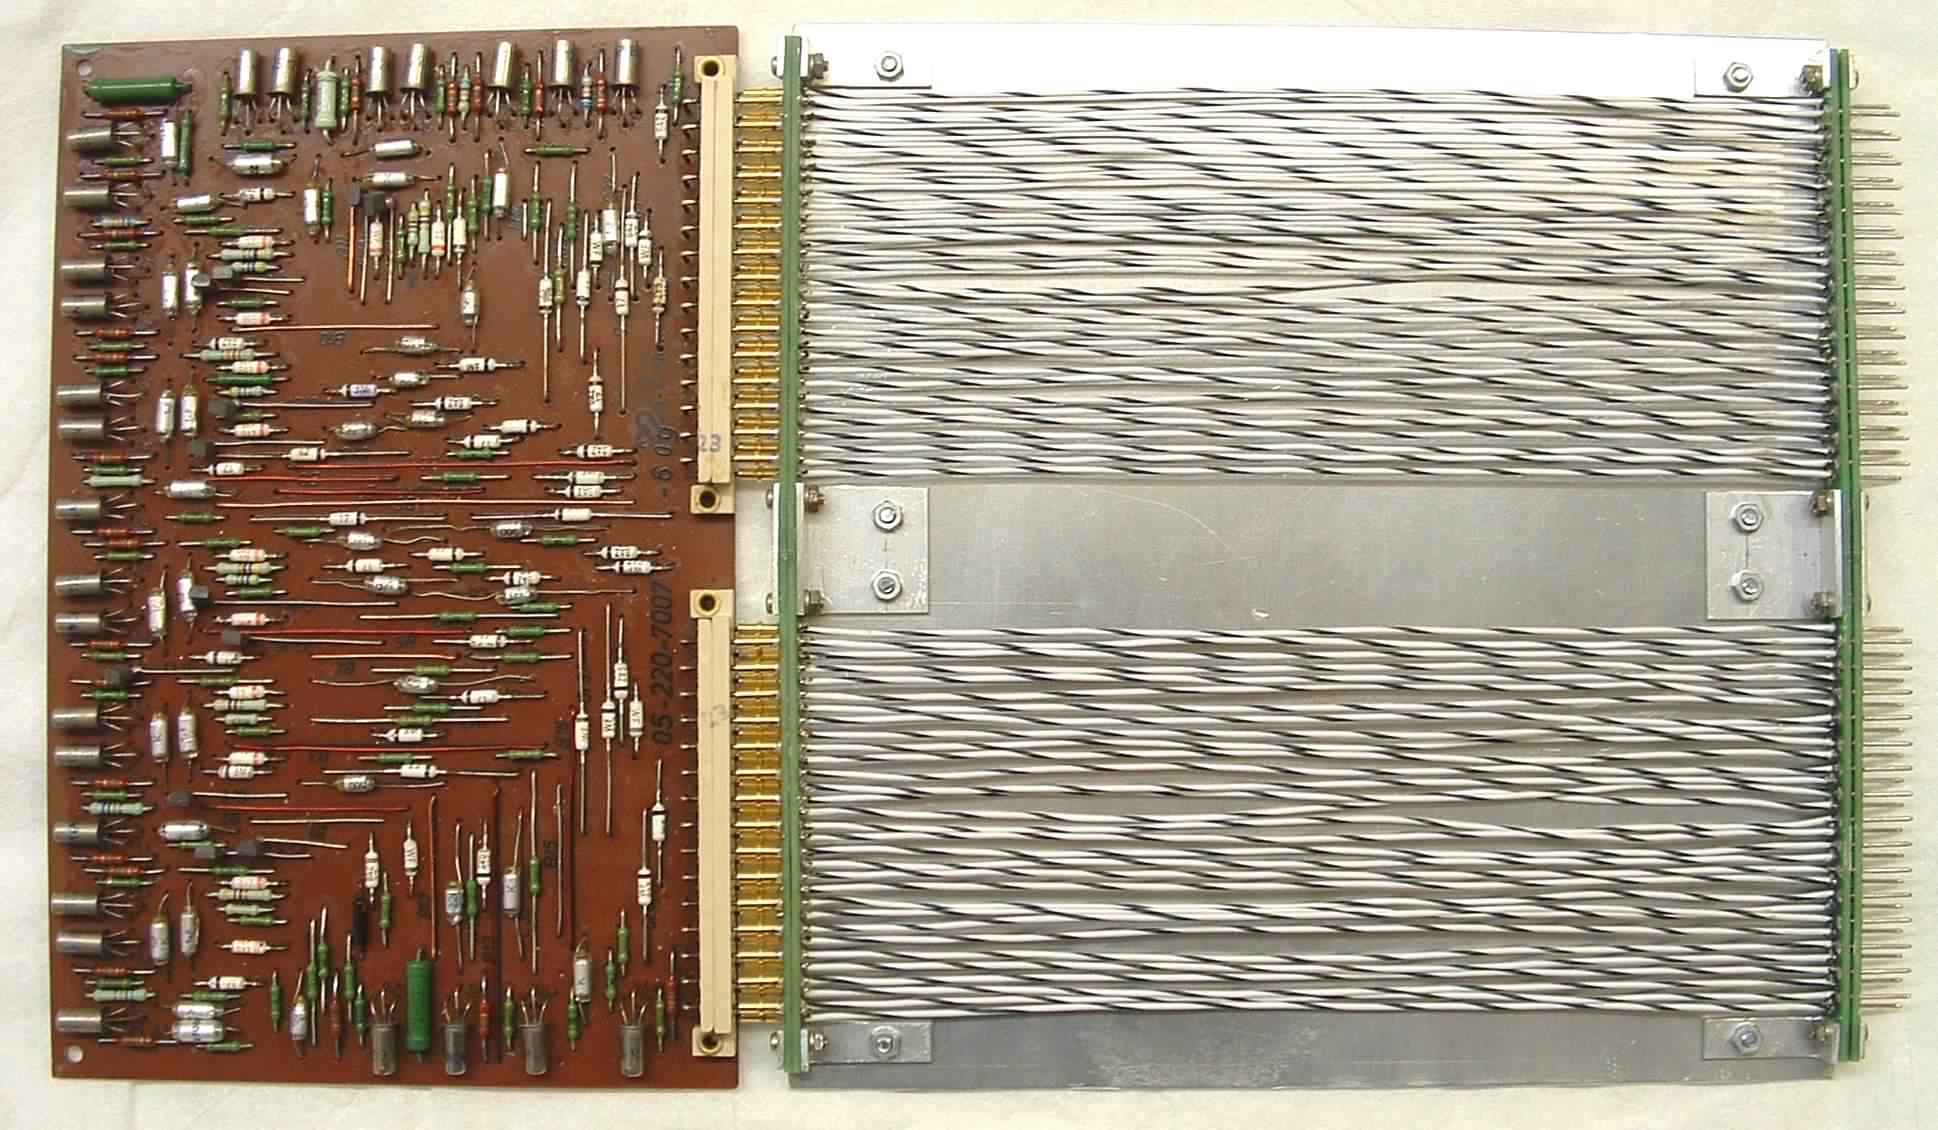
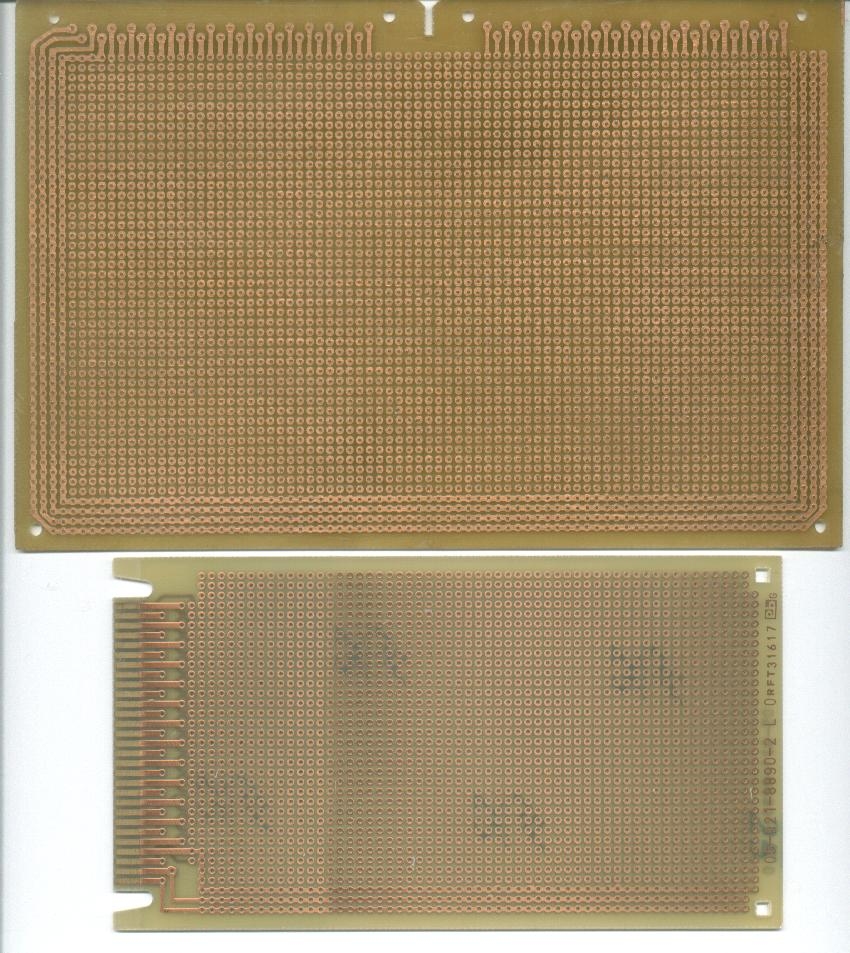
The third photo (right) is of a couple of prototyping boards, the topmost one being for the ETR22x series calculators and other machines that Soemtron produced using the same PCB form factor. These prototyping boards appear to be the more usual fiberglass construction, however it would appear that all boards manufactured for the Soemtron ETR22x range of machines were of the brown phenolic paper based construction. We presume this was for cost considerations, but it also could have been the availability of suitable fiberglass materials and resins in the GDR at the time.
 ETR220 production testing |
 ETR220 production testing |
 Prototyping boards |
| Photos ©1995 DESOTRON Used with permission. Click an image for a larger version | ||
| 1 | ETR220 production of 155,142 during 1966-1977 | Page 389 "BWS Sömmerda", by Annegret Schüle ISBN 39-8039-311-9, ©1995 Desotron Erfurt. 220 gallery[top] |
| 2 | OEM Ltd. Office and Electronic Machines Ltd., 140–154, Borough High Street, London, SE1 1LH. Marketing company for mechanical desk calculators. "Distributors for the United Kingdom and Republic of Ireland of Adler, Triumph, and Imperial typewriters, calculators, invoicing, accounting, word processing machines, and other office equipment and machines." (Text from an advert placed by OEM Ltd, in the Glasgow Herald of the 11th June 1973 which gives their results and prospects for 1973-4.
They were also known at various times as - Office and Electronic Machines PLC., O.E.M. (Systems Furniture) Ltd. (#01396792), O.E.M. Orion Ltd. (#01666907), O.E.M. Orion (#1179756). They appeared to have petitioned for the winding up of several other companies as their creditors in 1979 (entry #246) and 1982 (entry #173)[back] [top] | |
| 3 | ETR222 production of 3,203 during 1970–1972 | As 1. above. 222 gallery[back] [top] |
| 4 | ETR224 production of 526 during 1968–1974 | As 1. above. 224 gallery[back] [top] |
Site design ©2007– soemtron.org - privacy -